The head really needed a complete overhaul. The head was old, the plumbing pieced, patched
and generally not trustworthy, the wallpaper drab and nasty... time to do it!
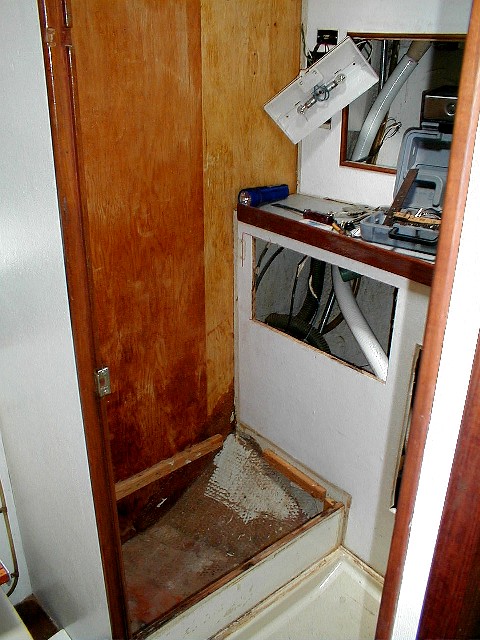
First a set of shots of the head after the old head fixture and most of the plumbing had been
removed. You can see we have removed the old wallpaper and teak trim strips from around the
floor pan. The door for under the sink is being replaced by a teak louvered one that we built
while we were building the various salon doors.
and generally not trustworthy, the wallpaper drab and nasty... time to do it!
First a set of shots of the head after the old head fixture and most of the plumbing had been
removed. You can see we have removed the old wallpaper and teak trim strips from around the
floor pan. The door for under the sink is being replaced by a teak louvered one that we built
while we were building the various salon doors.
A look at the new white vinyl "topper" we put onto the
pedestal, also a good shot of the old unpainted area below
the sink basin.
pedestal, also a good shot of the old unpainted area below
the sink basin.
Bare plywood was found under the
polka-dotted wallpaper (shot below)
polka-dotted wallpaper (shot below)
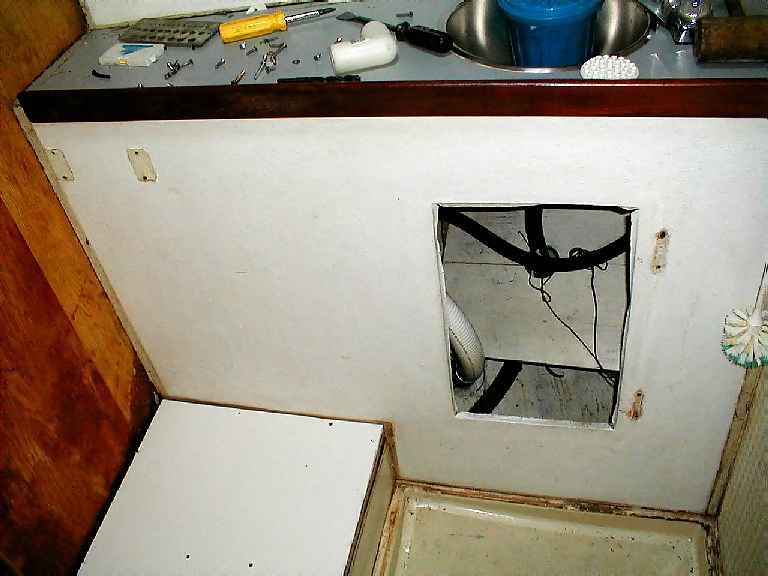
This shot shows the new access hole cut
below the countertop for giving ready
accessibility to the head pump and plumbing .
below the countertop for giving ready
accessibility to the head pump and plumbing .
Above you can see the pedestal
without the "topper", Hoo boy, big
job here, good thing the "team" is up
to the challenge.
without the "topper", Hoo boy, big
job here, good thing the "team" is up
to the challenge.
| Before Pictures |
| Head Makeover |

Here is a shot of the old "plumbing", complete with tape
and cable ties. The only thing missing is the laundry
detergent bottle that was taped in place to act as the
"holding tank".
and cable ties. The only thing missing is the laundry
detergent bottle that was taped in place to act as the
"holding tank".
| After Pictures |

This shot shows the access panel for the
plumbing and wiring for the Lavac. You can also
see the new louvered door, and the white vinyl
wallboard that we used as wallcovering. It really
brightens up the area and is "wipe-downable".
Click on the pic for an enlargement shot.
plumbing and wiring for the Lavac. You can also
see the new louvered door, and the white vinyl
wallboard that we used as wallcovering. It really
brightens up the area and is "wipe-downable".
Click on the pic for an enlargement shot.
The project began with tearing out all the old stuff, getting after everything with TSP and then
covering everything with one-part polyurethane paint. If you remember, we glassed-in a
holding tank, (a real one) in the bilge under the engine when we worked on the engine
replacement project. Now we needed to add the plumbing (through the salon) to connect the
two pieces. We used schedule 40 PVC for the rigid downslope sections and SeaLand
non-permeable hose for the curved sections.
We decided on a Lavac as our head of choice, and installed an electric pump (with 2 buttons, the
"guest" button - automatically runs the pump for about 30 seconds, and a toggle switch - for the
pro's - which runs the pump as long as you hold it), plus the manual pump is ready for use when
conserving power. You will notice up on the counter, a wood box which is the pump housing.
The pump needs to be elevated above the bowl etc.
After cruising for a while, and staying in a marina during the summer months, we decided to add
the ability to pump either fresh water or sea water using an electric pump rather than utilizing
the vacuum pumping method. That really makes things nice and civilized for us lazy folk.

Here we see the right side of the room. The
countertop has been painted with 2-part
polyurethane just like the galley counters and nav
station top. We added new fixtures, plus a
recessed, waterproof toilet paper holder.
Click on the pic for an enlargement shot.
countertop has been painted with 2-part
polyurethane just like the galley counters and nav
station top. We added new fixtures, plus a
recessed, waterproof toilet paper holder.
Click on the pic for an enlargement shot.

This shot shows the pump housing a bit better, with it's
spiffy pin rails (on the left side of the countertop).
Also, here's how the access door looks when closed. We
made teak tabs to hold it closed.
Click on the pic for an enlargement shot.
spiffy pin rails (on the left side of the countertop).
Also, here's how the access door looks when closed. We
made teak tabs to hold it closed.
Click on the pic for an enlargement shot.

